Opencart
Cashfree supports 3 versions for OpenCart integration,- OpenCart version 3.0
- OpenCart version 2.3 and 2.1
Download Cashfree’s official Opencart plugin
OpenCart Version 3.0
To add Cashfree Payment Gateway to your OpenCart account,- Download Cashfree’s Plugin for Opencart Version 3.0.
- Copy all files/folders in the Admin and Catalog folder to OpenCart installation directory.
- Login to OpenCart.
- In the OpenCart Dashboard, go to Admin Panel > Extensions. Select the extension type as Payments.
- Click the edit button next to Cashfree in the screen.
- Fill in the details in the configuration screen and save.
End Points: Production -
https://api.cashfree.comTest -https://test.cashfree.com
Opencart Video
Opencart Video
Prestashop
Currently, we support the following PrestaShop versions:- PrestaShop 1.7x
- PrestaShop 1.5x and 1.6x
- Log in to your PrestaShop Admin Dashboard and click Modules on the left side menu.
- Click Module Manager > upload a module.
- Select the module file to upload. Ensure the file format is as per the guidelines. On successful upload, a screen appears as shown below, and the module is successfully installed.
- After successful installation, click Configure to set up the module configuration.
- In the Configure screen:
a. Enter your Cashfree Payment Gateway App Id and Secret Key.
b. Select the Test Mode as Yes for Test Environment and No for Production Environment.
c. Select the Success Order Status as Processing in progress. - Click Save to save the module configuration. The Configure screen appears as shown below.

StoreHippo
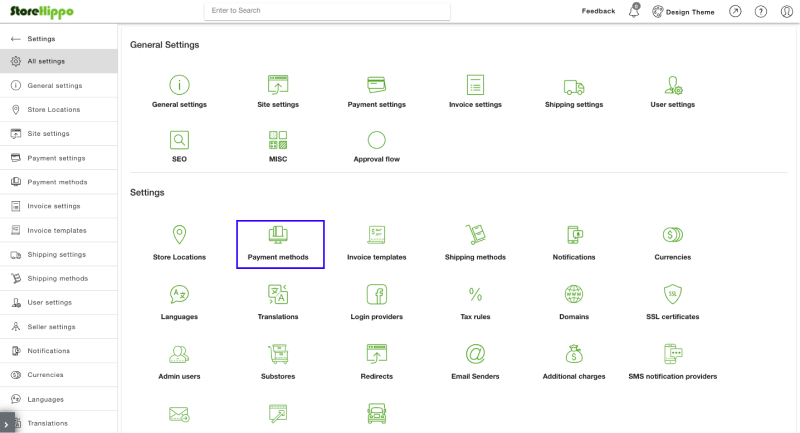
To add Cashfree Payment Gateway to your StoreHippo account,- Log in to your StoreHippo account and click Settings in the left navigation section.
-
In the Settings section, select Payment methods.
Settings - Payment Methods
-
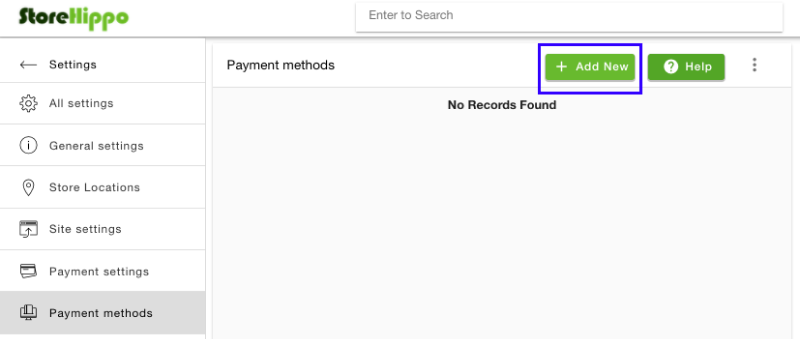
In the Payment methods screen, click Add New to add a new payment gateway.
Add New Payment Method
- In the Payment methods / Add screen, enter the following:
- In the Name field specify a name to represent the payment method. This will be visible to your customers.
- In the Type field, select Payment Gateways.
- In the Settings field, select Cashfree, and enter the App ID and Secret Key. To test the integration, you can use the test keys, to accept payments from customers, enter the production keys.
Click here for more information on API Keys. - In the Caption field, you can enter details that must be displayed on the payments page for your customers.
- In the Image field, you can select a payment method logo.
- Select the Enabled checkbox to activate this payment method.
Save Payment Method
Save Payment Method
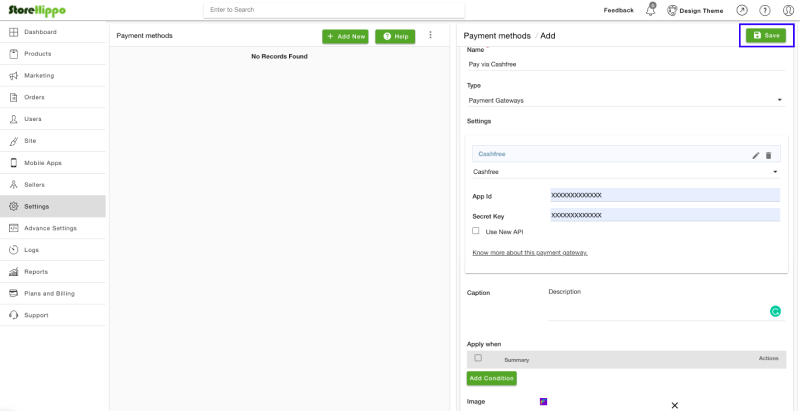
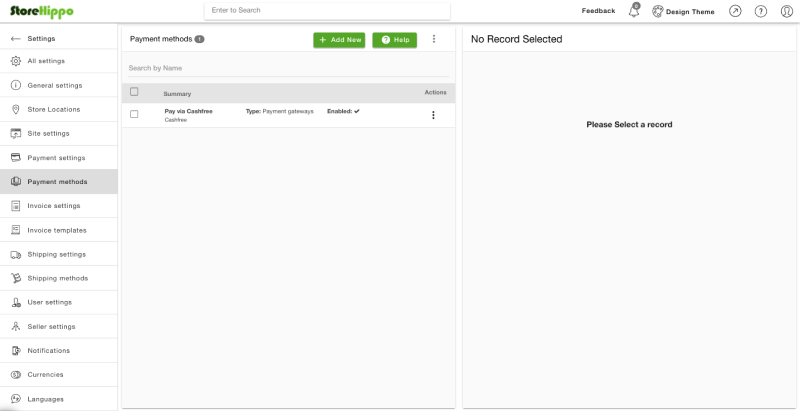
- Click Save to add the new payment method.
Cashfree Payment Method Added
Cashfree Payment Method Added
WHMCS
WHMCS (Web Host Manager Complete Solution) is a web host billing and automation platform. WHMCS is the market-leading platform of choice for Web Hosting Providers and Domain Registrars to automate and manage their businesses. Cashfree supports WHMCS 7 and WHMCS 8 versions for integration. To add Cashfree Payment Gateway to your WHMCS account,Download Module
- Unzip the downloaded file and upload the contents of the repository to your WHMCS Installation directory.
-
Log into your site with the WHMCS administrator credentials. You can do this by adding /admin to the URL where you have installed WHMCS. For example,
www.example.com/whmcs/admin. -
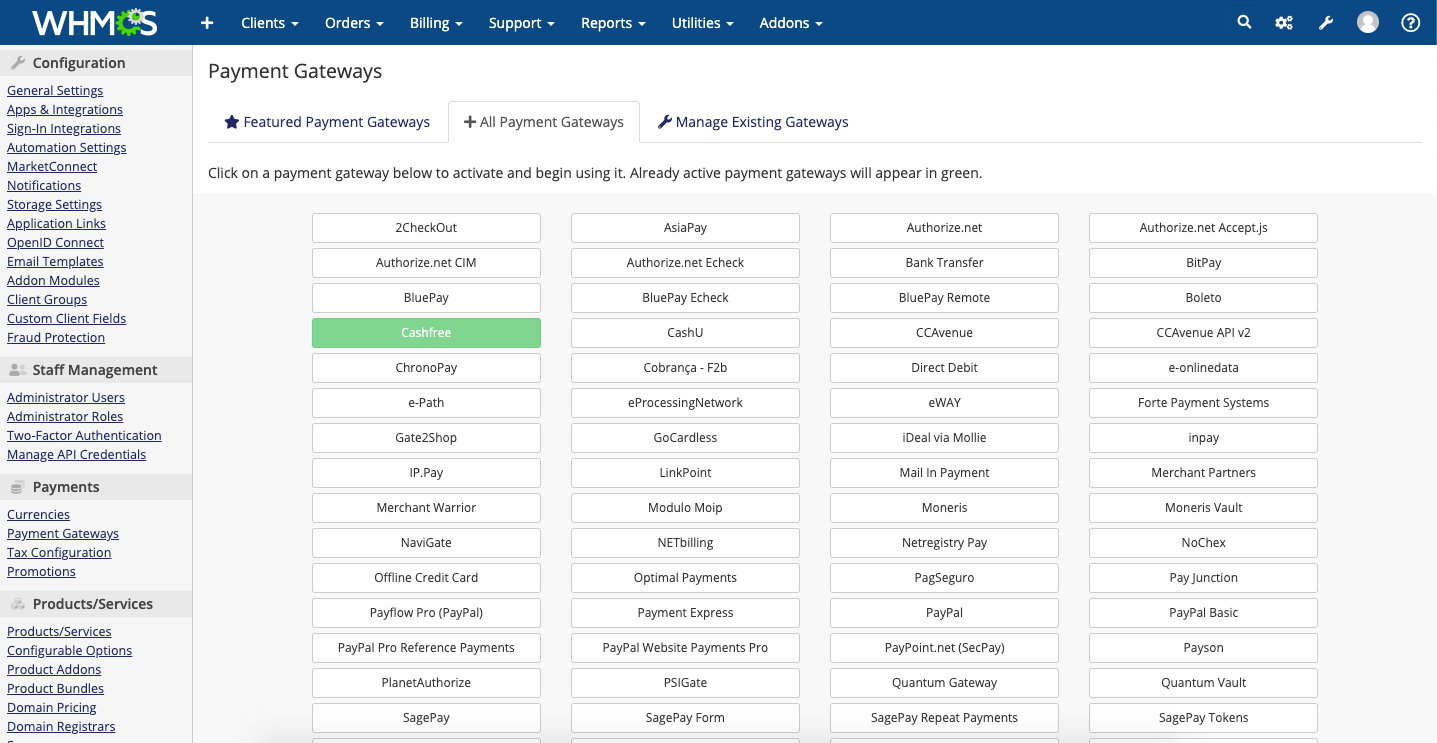
In the WHMCS Admin Dashboard, go to Setup > Payment Gateways > All Payment Gateways, and select Cashfree from the list and activate it.
- Enter your Cashfree Payment Gateway App Id and Secret Key.
-
Click the checkbox if you want to enable test mode.
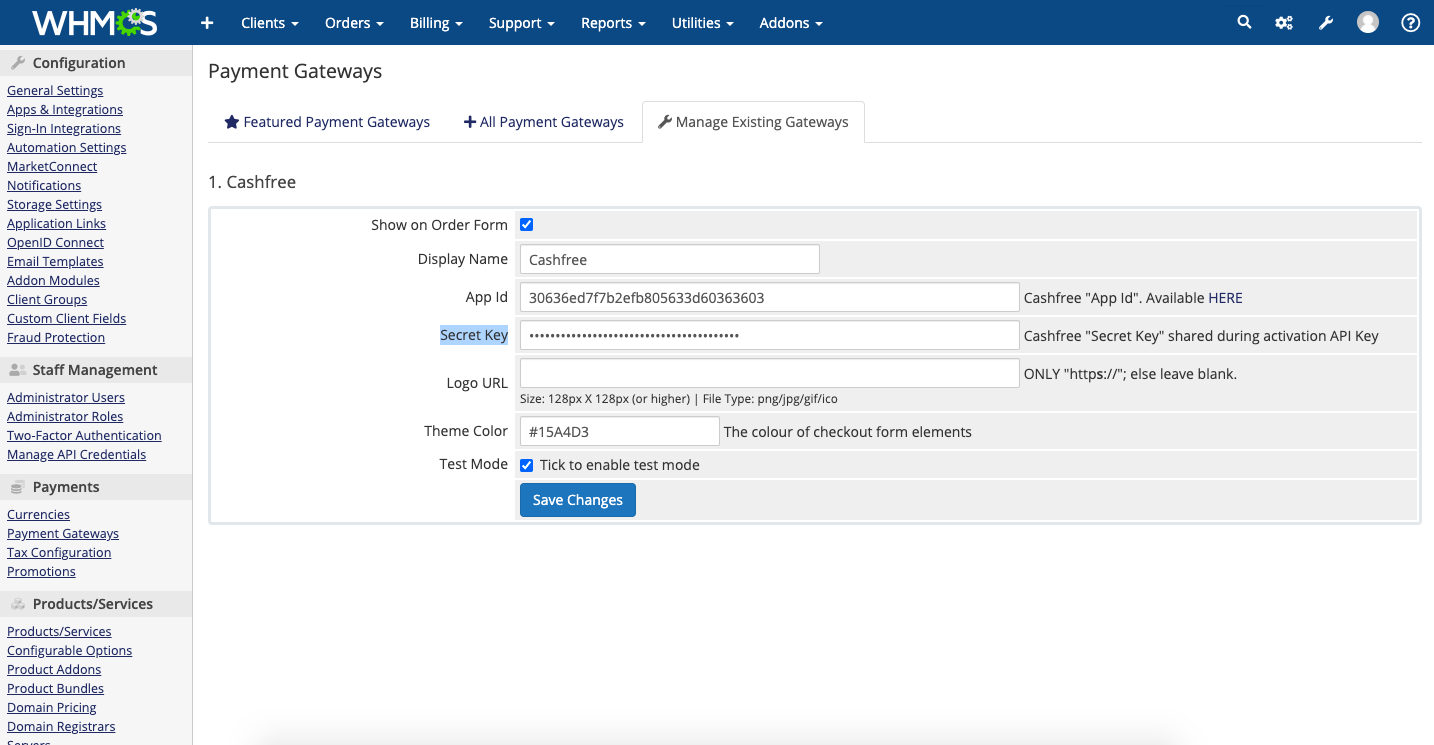
- Click Save Changes.
ZenCommerce
To add Cashfree Payment Gateway to your Zencommerce account,- Log in to your Zencommerce account and click Extras and Integrations in the left navigation section.
- Click Applications and select Cashfree Payment Gateway.
- In the Cashfree Payment Gateway applications section, click Install.
-
In the Application Installation screen, click Install. After successful installation, a message Application has been installed in your shop! appears on the screen.
Install Application

-
Click My Applications in the Extras and Integrations section. A screen appears as shown below:
Installed Cashfree Payment Gateway Application

-
Click the application and then click Settings as shown below.
Settings

-
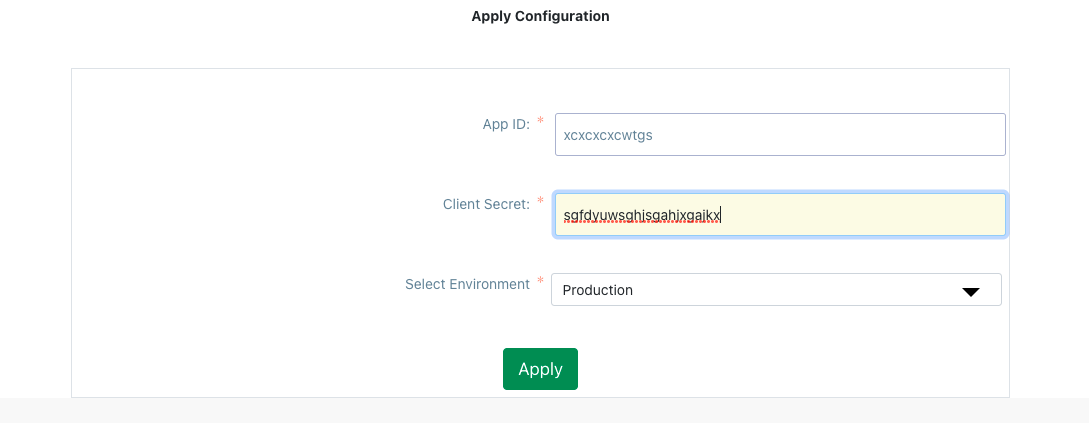
In the Apply Configuration screen, enter the App ID and Client Secret for your Cashfree Payments account. Select Production or Test as the environment and click Apply.
Set Up Cashfree Payment Gateway
Arastta
To add Cashfree Payment Gateway to your Zencommerce account,Download the upload.zip file
- Login to the Arastta admin dashboad and click Extensions.
-
Select Payments and click the upload extension icon in the Payment screen and upload the upload.zip file you downloaded in step 1.
Arastta Dashboard
-
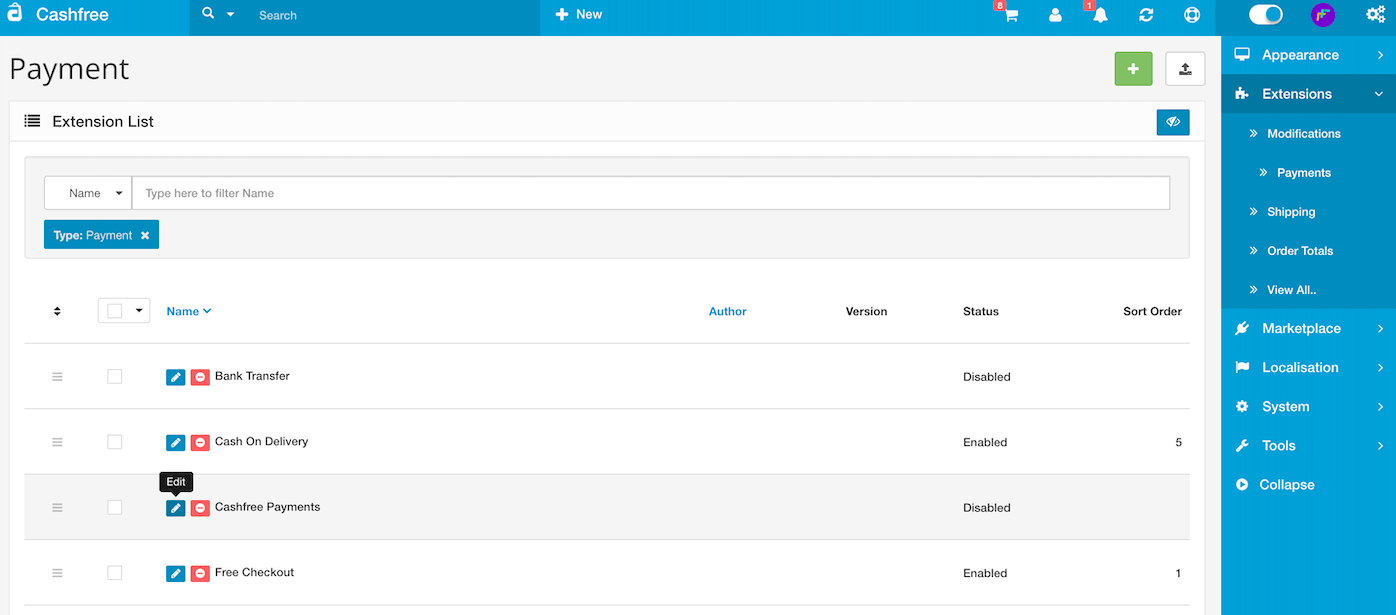
Cashfree Payments will be listed in the payment page as shown below:
Add Cashfree Payments Extension
-
Click the edit icon to change the configuration.
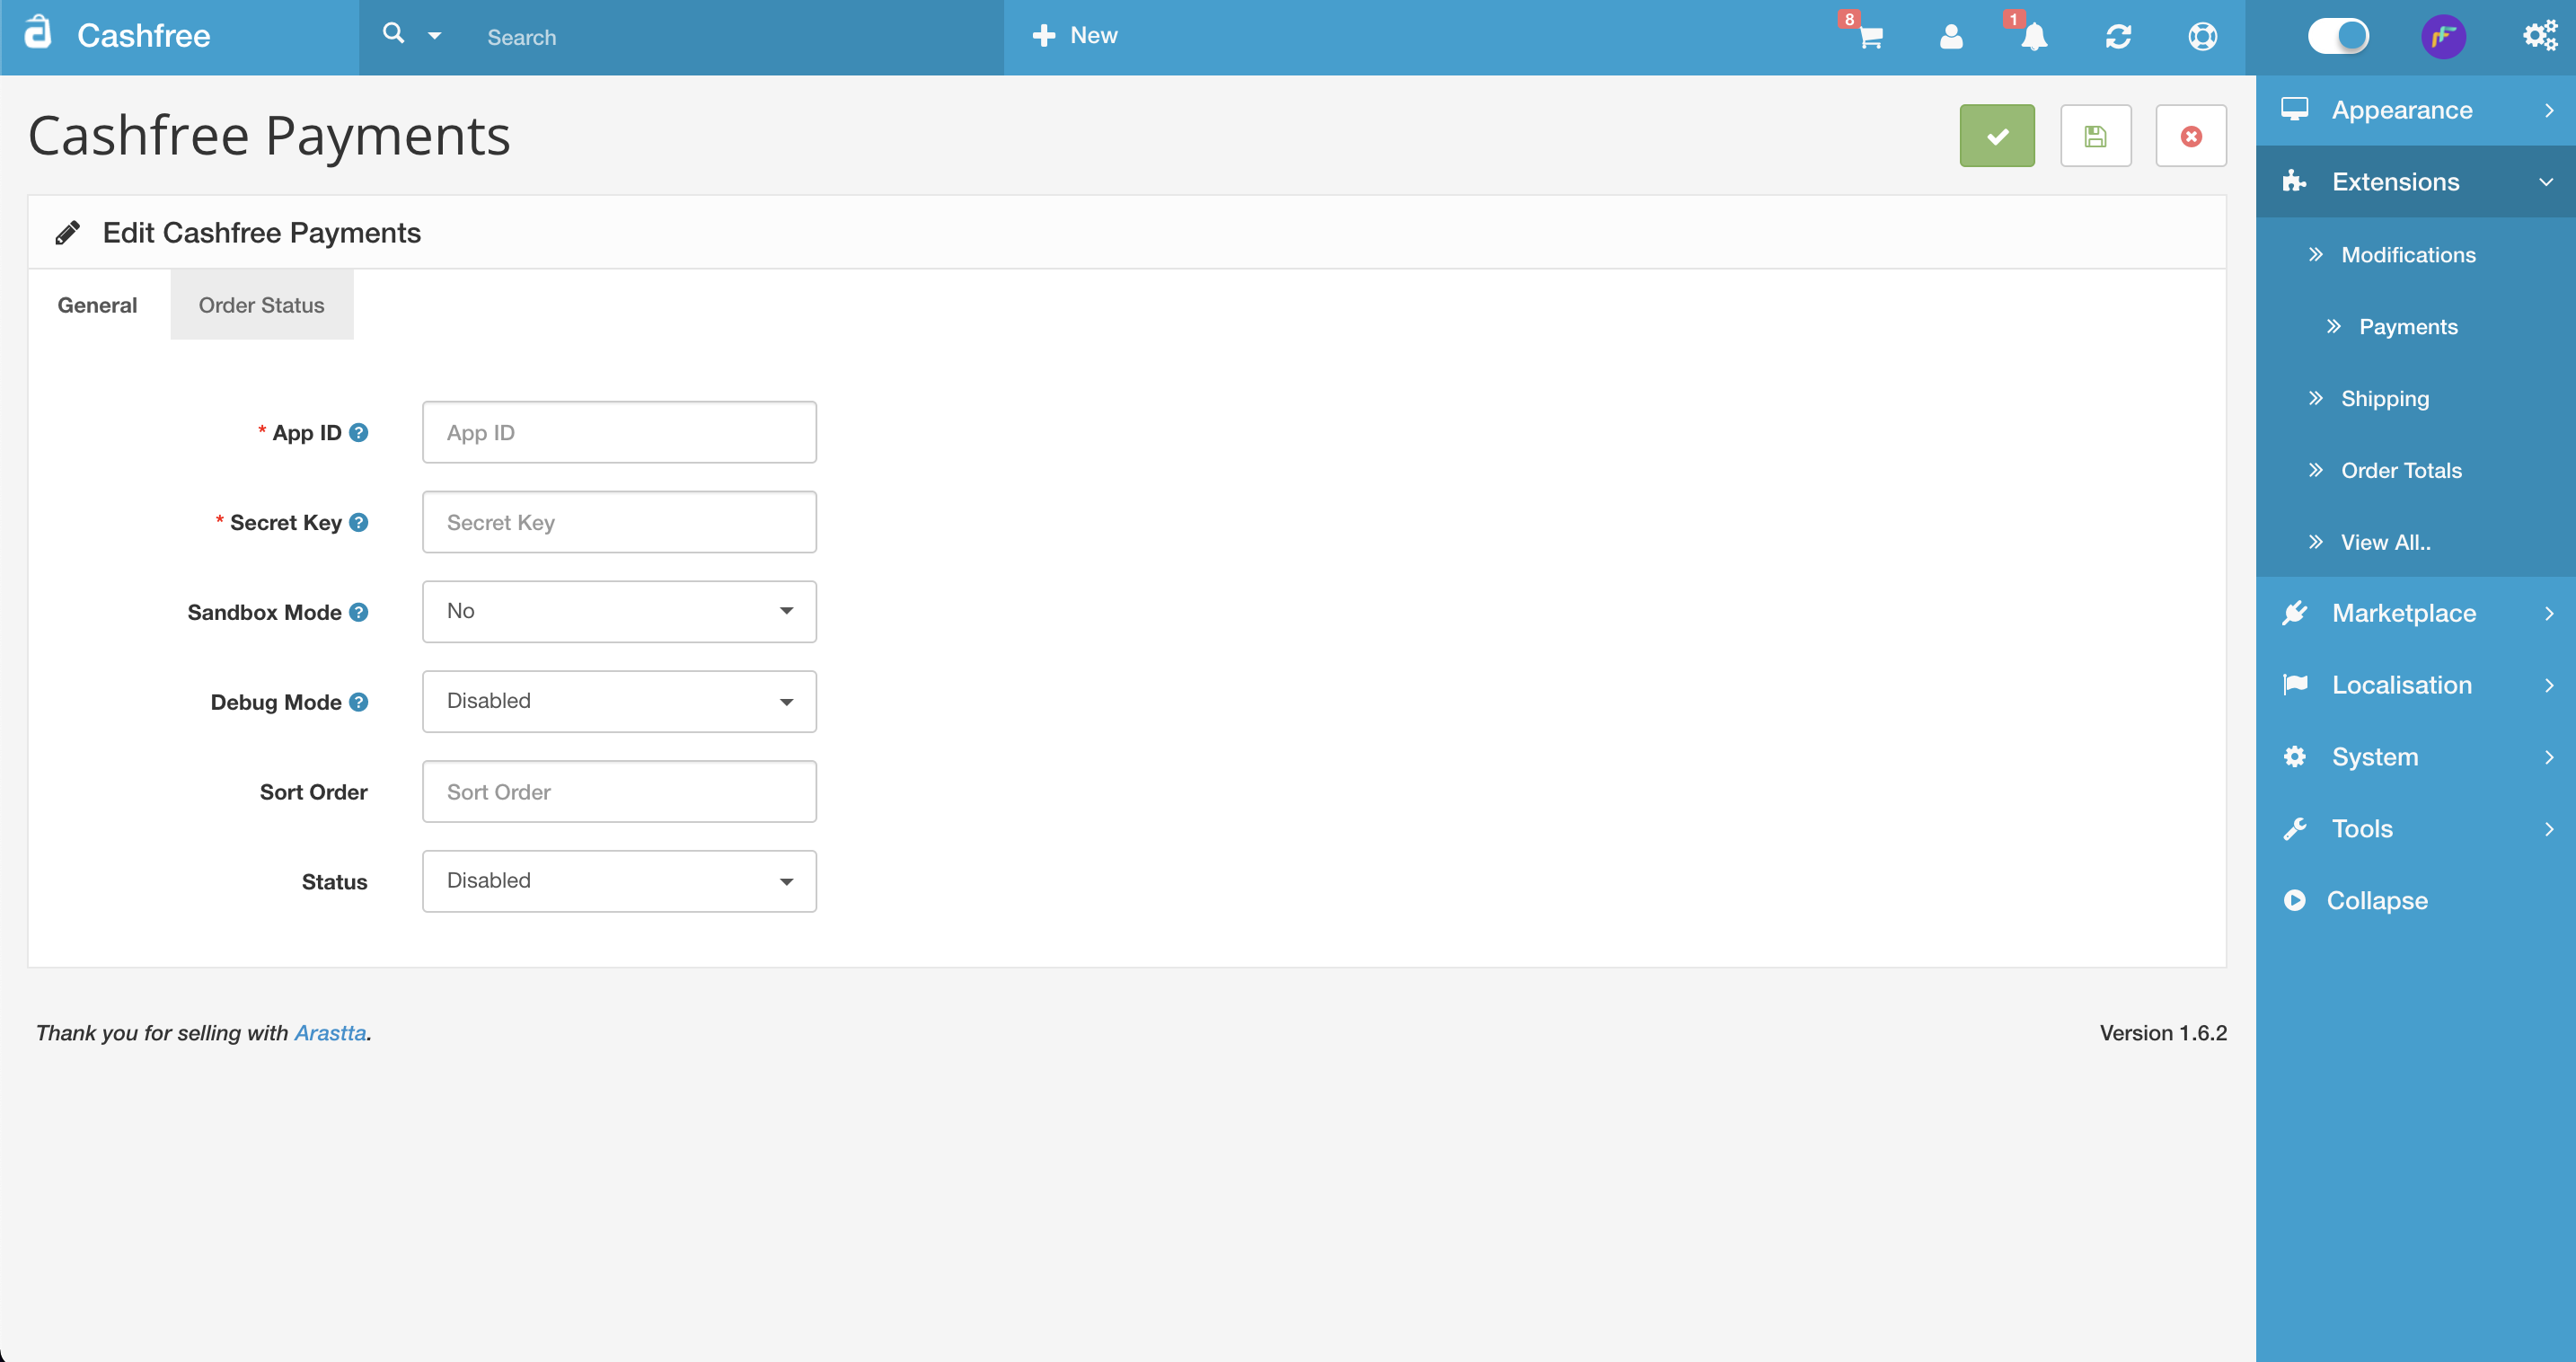
a. In General tab:- Enter your Cashfree Payments account App ID.
- Enter your Cashfree Payments account Secret Key.
- In the Sandbox Mode option, select Yes, when you want to test the integration. Select
No, when you want to accept live payments. - Select the Debug Mode and Sort Order as per your requirements.
- Change plugin Status to Enabled.
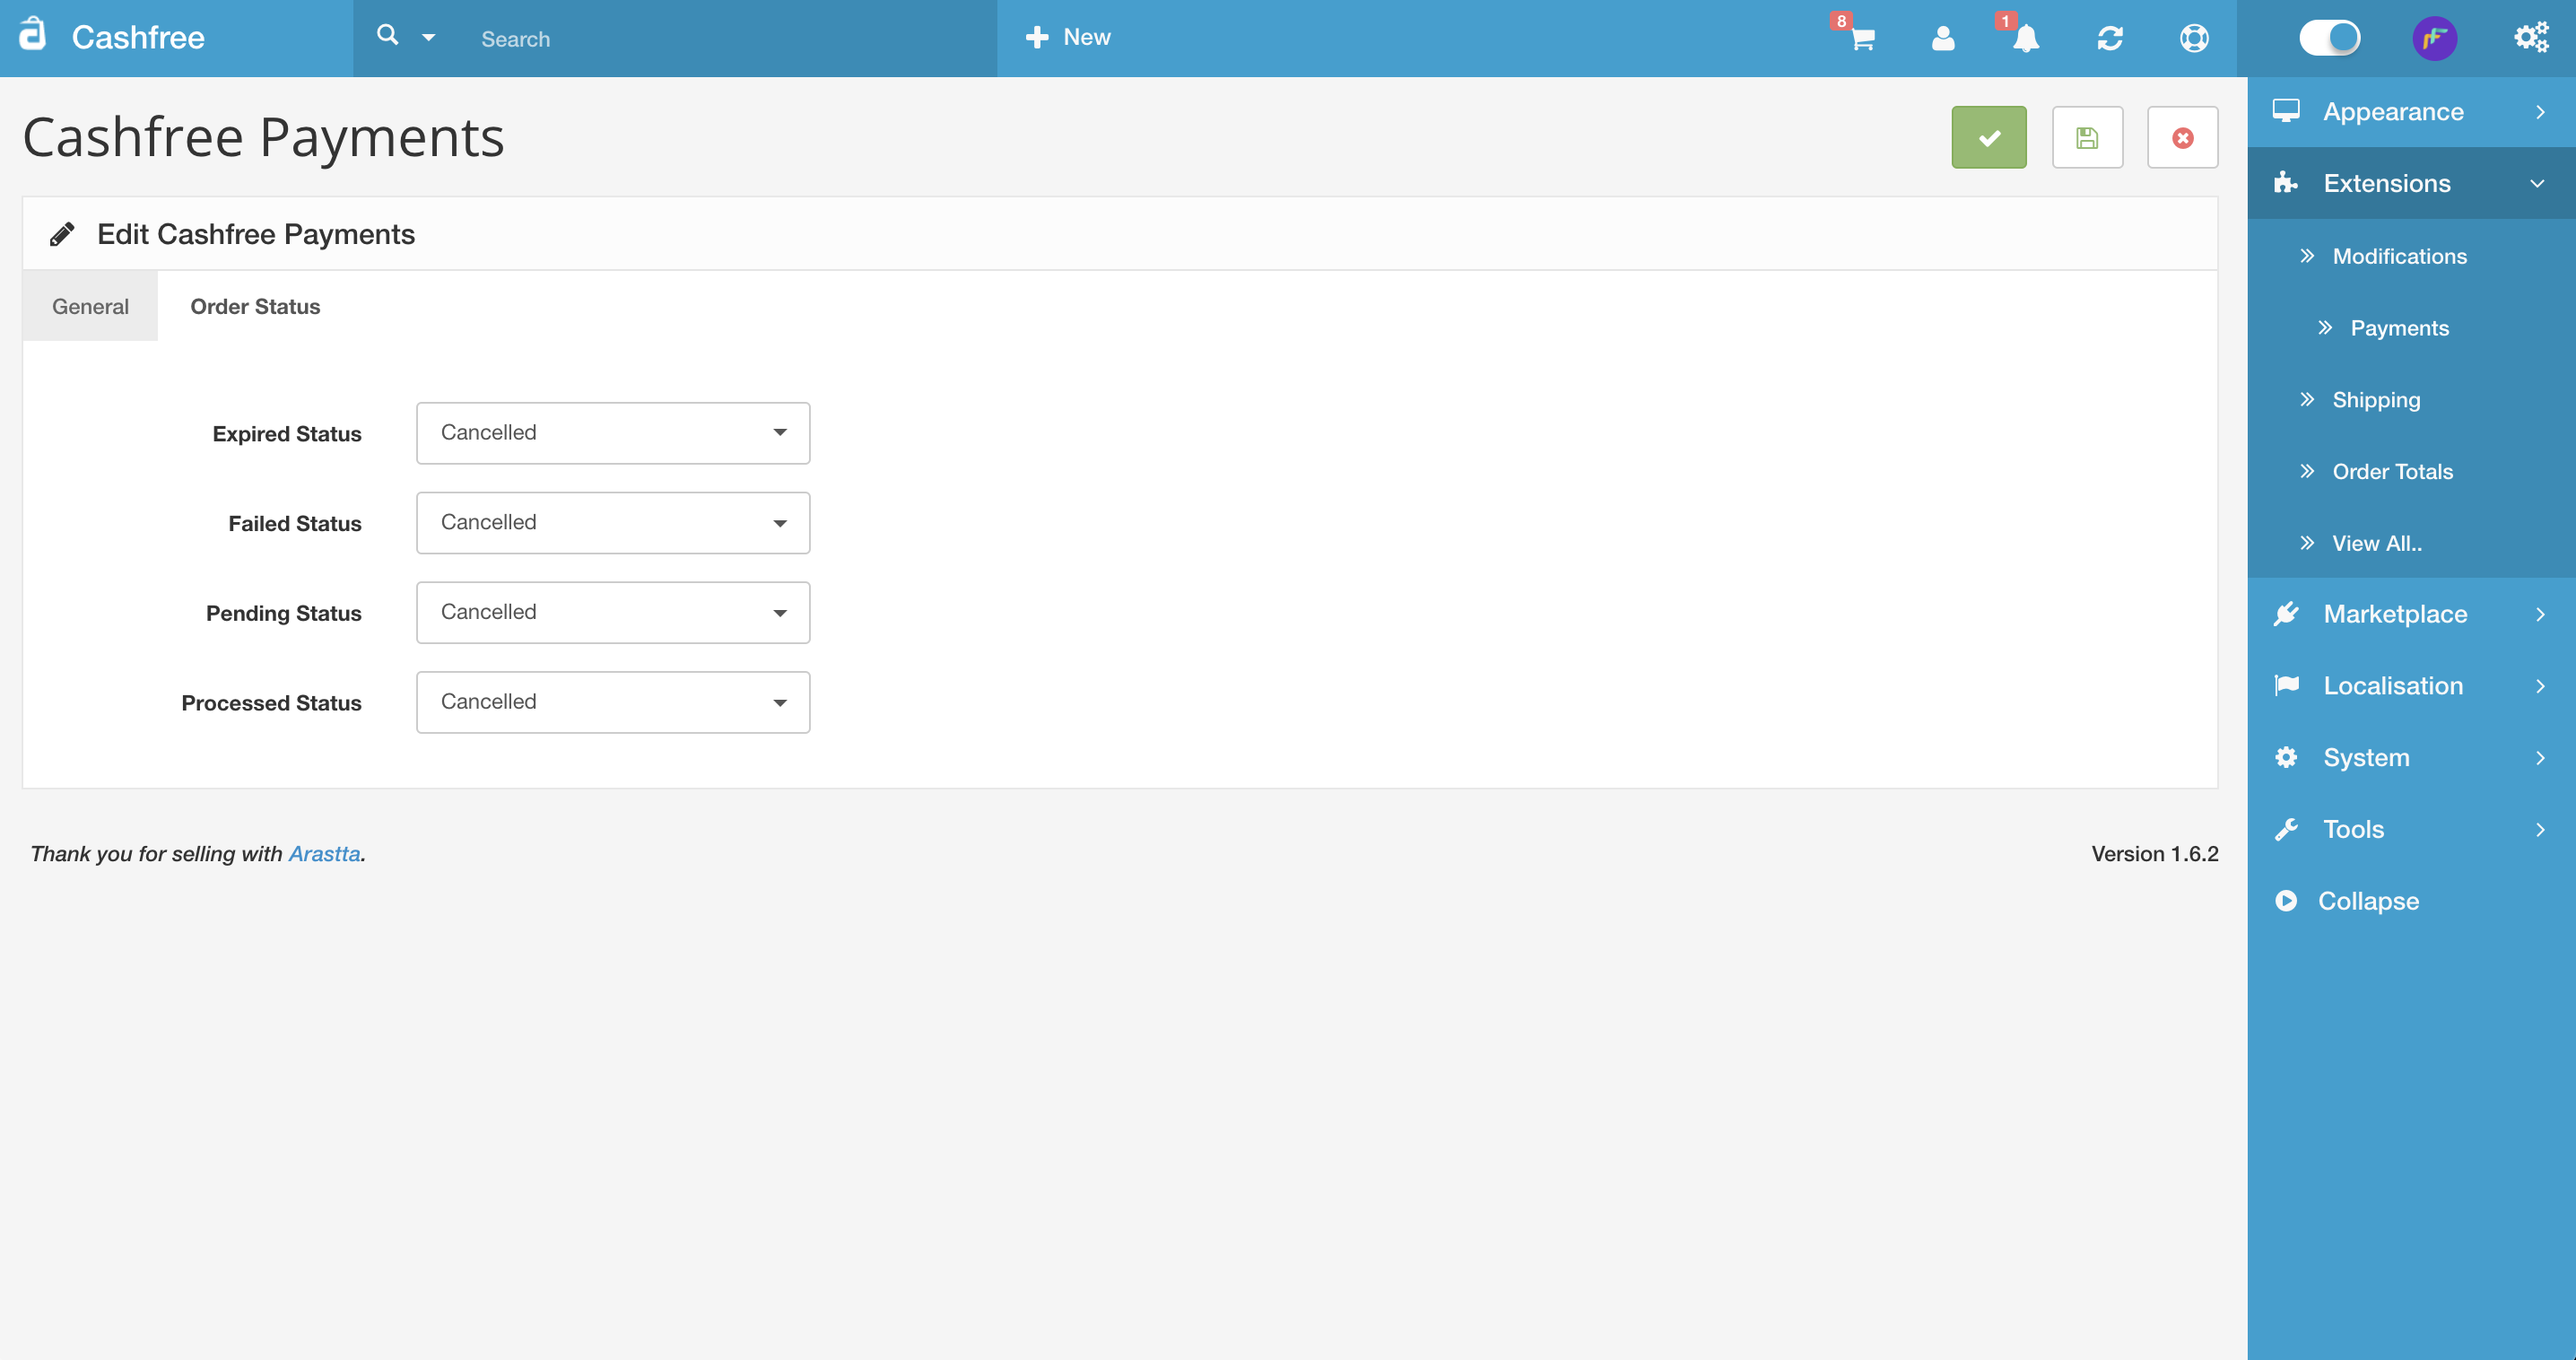
b. In Order Status tab: - Select order status for expired orders. - Select order status for failed orders. - Select order status for pending orders. - Select order status for processed orders.General Settings
Order Status Settings
- Save the plugin settings. Your customers can start making payments using Cashfree Payment Gateway.
CSCart
Download Cashfree’s official CS-Cart plugin
- Install the latest version of CS-Cart.
The file contains integration code for interaction with the Cashfree API and allows payment in CS-Cart seamlessly. - Execute ‘install_cashfree.sql’ against CS-Cart database. The file is available in the root directory of this file. Change prefix if you have added during installation of CS-Cart. You can either use phpmyadmin to import SQL file directly or run SQL queries in your MySQL shell.
- Upload the contents of the repo to your CS-Cart Installation directory (the content of the app folder must be uploaded to the app folder and the content of design should be uploaded to the design folder).
- Log into CS-Cart as administrator (
http://your.cscart.store.com/admin.php). - Go to Administration > Payment Methods.
- Click the + icon to add a new payment method.
- Enter Name as Cashfree.
- Select Cashfree from the list and template and select “cc_outside.tpl”.
- Enter your Cashfree Payment Gateway App Id and Secret Key.
- Select Currency from the dropdown.
- Select Test or Production environment.
- Click Create to save the configuration.
Read about whitelisting your store url
before you can accept payments on your store.